webpack输出文件浅析

概述

webpack is a module bundler for modern JavaScript applications. When webpack processes your application, it recursively builds a dependency graph that includes every module your application needs, then packages all of those modules into a small number of bundles - often only one - to be loaded by the browser.

webpack是目前最流行的用于现代JavaScript应用的模块打包器,如果你用了webpack,它会递归地构建一个你的工程所需的所有模块的依赖图,然后将所有模块打包成几个文件(通常只有一个)以供浏览器加载。

本文不打算介绍webpack的基本使用,而是着重于分析生成的打包文件的结构以及它和源文件的关系。

配置文件和待打包的源码

先来看工程结构。

1
2
3
4
5
6
7
8
9
.
├── dist
│   └── index.html
├── package.json
├── src
│   ├── index.js
│   └── print.js
├── webpack.config.js
└── yarn.lock

待分析的工程的配置文件。

1
2
3
4
5
6
7
8
9
10
11
12
// ./webpack.config.js
const path = require('path');

module.exports = {
entry: {
app: './src/index.js'
},
output: {
filename: '[name].bundle.js',
path: path.resolve(__dirname, 'dist')
}
}

这里只做一个最简单的功能,只有一个入口文件,./src/index.js,然后将打包后的文件是app.bundle.js。

接下来是HTML文件和JS文件。

1
2
3
4
5
6
7
8
9
10
11
<!-- ./dist/index.html -->
<!DOCTYPE html>
<html lang="en">
<head>
<meta charset="UTF-8">
<title>Document</title>
</head>
<body>
<script type="text/javascript" src="./app.bundle.js"></script>
</body>
</html>
1
2
3
4
5
6
7
8
9
10
11
12
13
14
15
16
// ./src/index.js
import printMe from './print.js';

function component() {
const element = document.createElement('div');
const btn = document.createElement('button');

btn.innerHTML = 'Click me and check the console!';
btn.onclick = printMe;

element.appendChild(btn);

return element;
}

document.body.appendChild(component());
1
2
3
4
// ./src/print.js
export default function() {
console.log('I get called from print.js.');
}

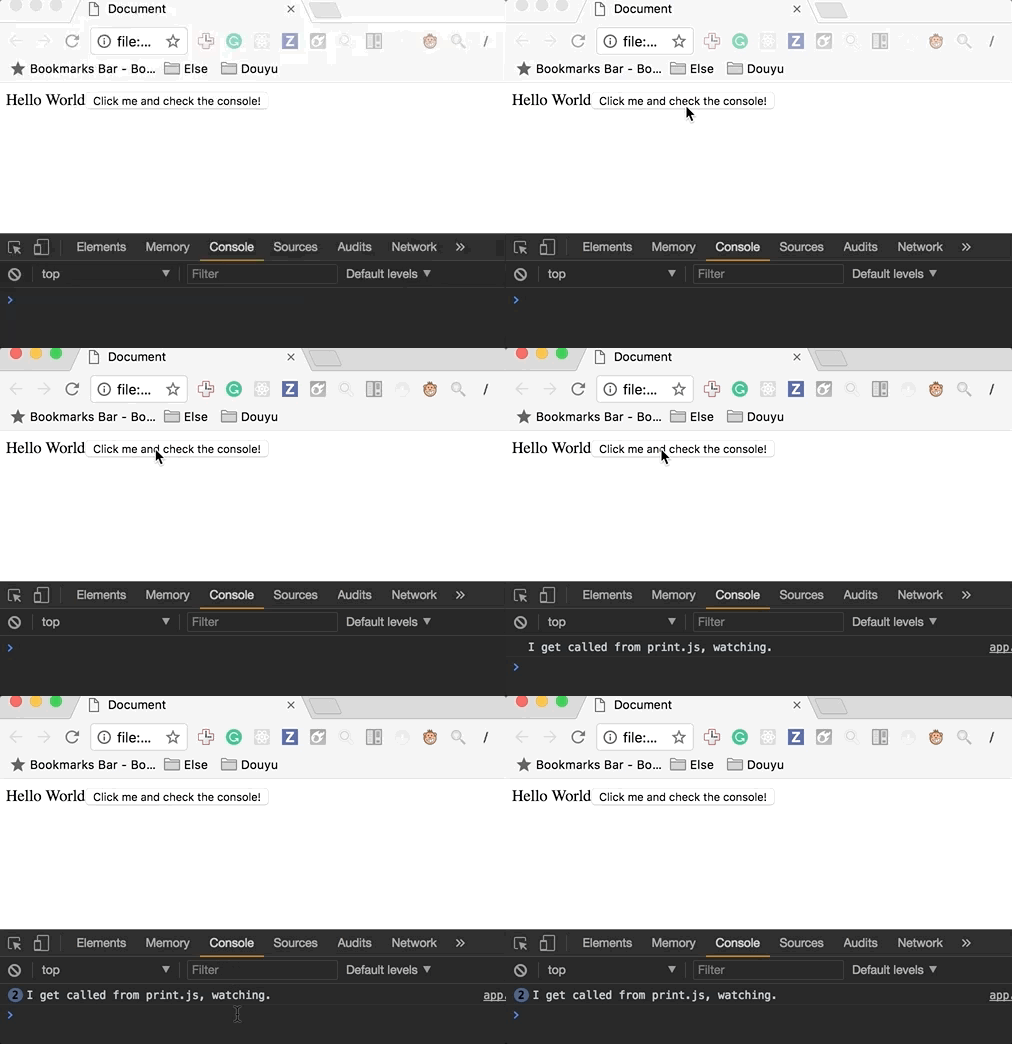
然后使用webpack生成打包文件。

文件无效

bundle文件

现在来看看app.bundle.js文件。

1
2
3
4
5
6
7
8
9
10
11
12
13
14
15
16
17
18
19
20
21
22
23
24
25
26
27
28
29
30
31
32
33
34
35
36
37
38
39
40
41
42
43
44
45
46
47
48
49
50
51
52
53
54
55
56
57
58
59
60
61
62
63
64
65
66
67
68
69
70
71
72
73
74
75
76
77
78
79
80
81
82
83
84
85
86
87
88
89
90
91
92
93
94
95
96
97
98
99
100
101
102
103
104
// ./dist/app.bundle.js
/******/ (function(modules) { // webpackBootstrap
/******/ // The module cache
/******/ var installedModules = {};
/******/
/******/ // The require function
/******/ function __webpack_require__(moduleId) {
/******/
/******/ // Check if module is in cache
/******/ if(installedModules[moduleId]) {
/******/ return installedModules[moduleId].exports;
/******/ }
/******/ // Create a new module (and put it into the cache)
/******/ var module = installedModules[moduleId] = {
/******/ i: moduleId,
/******/ l: false,
/******/ exports: {}
/******/ };
/******/
/******/ // Execute the module function
/******/ modules[moduleId].call(module.exports, module, module.exports, __webpack_require__);
/******/
/******/ // Flag the module as loaded
/******/ module.l = true;
/******/
/******/ // Return the exports of the module
/******/ return module.exports;
/******/ }
/******/
/******/
/******/ // expose the modules object (__webpack_modules__)
/******/ __webpack_require__.m = modules;
/******/
/******/ // expose the module cache
/******/ __webpack_require__.c = installedModules;
/******/
/******/ // define getter function for harmony exports
/******/ __webpack_require__.d = function(exports, name, getter) {
/******/ if(!__webpack_require__.o(exports, name)) {
/******/ Object.defineProperty(exports, name, {
/******/ configurable: false,
/******/ enumerable: true,
/******/ get: getter
/******/ });
/******/ }
/******/ };
/******/
/******/ // getDefaultExport function for compatibility with non-harmony modules
/******/ __webpack_require__.n = function(module) {
/******/ var getter = module && module.__esModule ?
/******/ function getDefault() { return module['default']; } :
/******/ function getModuleExports() { return module; };
/******/ __webpack_require__.d(getter, 'a', getter);
/******/ return getter;
/******/ };
/******/
/******/ // Object.prototype.hasOwnProperty.call
/******/ __webpack_require__.o = function(object, property) { return Object.prototype.hasOwnProperty.call(object, property); };
/******/
/******/ // __webpack_public_path__
/******/ __webpack_require__.p = "";
/******/
/******/ // Load entry module and return exports
/******/ return __webpack_require__(__webpack_require__.s = 0);
/******/ })
/************************************************************************/
/******/ ([
/* 0 */
/***/ (function(module, __webpack_exports__, __webpack_require__) {

"use strict";
Object.defineProperty(__webpack_exports__, "__esModule", { value: true });
/* harmony import */ var __WEBPACK_IMPORTED_MODULE_0__print_js__ = __webpack_require__(1);


function component() {
const element = document.createElement('div');
const btn = document.createElement('button');

element.innerHTML = 'Hello World';

btn.innerHTML = 'Click me and check the console!';
btn.onclick = __WEBPACK_IMPORTED_MODULE_0__print_js__["a" /* default */];

element.appendChild(btn);

element.classList.add('hello');
return element;
}

document.body.appendChild(component());

/***/ }),
/* 1 */
/***/ (function(module, __webpack_exports__, __webpack_require__) {

"use strict";
/* harmony export (immutable) */ __webpack_exports__["a"] = printMe;
function printMe() {
console.log('I get called from print.js, watching.');
}

/***/ })
/******/ ]);

看上去很复杂,我们先要搞清楚,整个代码的结构是怎样的,否则无从下手。

稍微整理一下会发现,其实这个bundle文件是一个大的IIFE,而这个IIFE的参数modules,实际上接收的一个由函数组成的数组,这样每个源码中的模块都是在一个函数作用域中,因此调用执行都是独立,不会相互影响,从而达到实现模块的效果。

1
2
3
4
5
6
7
(function(modules) {
// handle modules
})([(function() {
// modules 0
}), (function() {
// modules 1
})]);

如果把代码的结构整理成这样,就容易理解多了,各个模块函数都放到一个数组中,并在IIFE中被处理。

为了方便理解,我们把bundle文件中重要的代码逐步提取出来,再分析bundle文件到底是怎么执行的。

先从IIFE的函数体开始来看,虽然看上去里面有很多代码,但是最关键的只有两个,就是installedModeules对象和webpack_require函数,一个用于缓存已经被调用执行过的模块,另一个用于调用执行模块。

1
2
3
4
5
6
7
8
9
10
11
12
13
14
15
16
17
18
19
20
21
22
23
24
25
26
27
28
29
(function(modules) {
// 缓存模块,模块信息和模块执行结果
const installedModules = {};
// require函数,模块引用需要用到的函数
function __webpack_require__(moduleId) {
// 如果缓存中存在需要被调用的模块,则直接返回该模块的导出结果
if(installedModules[moduleId]) {
return installedModules[moduleId].exports;
}
// 没有缓存的话,创建一个module对象
const module = installedModules[moduleId] = {
i: moduleId,
l: false,
exports: {}
};
// 执行被调用的模块中的代码
modules[moduleId].call(module.exports, module, module.exports, __webpack_require__);
// 标记当前模块已经被加载过了
module.l = true;
// 返回模块的导出结果
return module.exports;
}
// 其他辅助属性
// ...
})([(function() {
// modules 0
}), (function() {
// modules 1
})]);

IIFE中的其他代码为webpack_require对象添加了一些辅助属性和一些支持最新ES6模块的工具方法(异步引入等)。

我们在源码中一共有两个模块(index.js和print.js),因此也就有参数数组中也就是有两个函数。

1
2
3
4
5
6
7
8
9
10
11
12
13
14
15
16
17
18
19
20
21
22
23
24
25
26
27
28
29
30
31
32
33
34
35
(function(modules) {
// ...
})([(function(module, __webpack_exports__, __webpack_require__) {
// 模块函数传入3个参数,分别是当前缓存模块,导出对象,引入对象(函数)
"use strict";
// 标记当前模块为es模块
Object.defineProperty(__webpack_exports__, "__esModule", { value: true });
// 关键,由于本文件依赖于print.js,这里使用__webpack_require__引入模块,1表示print模块在参数数组中的下标
const __WEBPACK_IMPORTED_MODULE_0__print_js__ = __webpack_require__(1);

function component() {
const element = document.createElement('div');
const btn = document.createElement('button');

element.innerHTML = 'Hello World';

btn.innerHTML = 'Click me and check the console!';
btn.onclick = __WEBPACK_IMPORTED_MODULE_0__print_js__["a"];

element.appendChild(btn);

element.classList.add('hello');
return element;
}

document.body.appendChild(component());

}), (function(module, __webpack_exports__, __webpack_require__) {
"use strict";
// 将printMe函数放到导出模块中
__webpack_exports__["a"] = printMe;
function printMe() {
console.log('I get called from print.js, watching.');
}
})])

首先webpack对于每个模块的处理是分别放到一个函数中去,可以看一下webpack_require中的这一行代码:

1
modules[moduleId].call(module.exports, module, module.exports, __webpack_require__);

函数被传入了3个参数,分别是当前缓存模块,缓存模块的导出对象,引入对象(函数)。所以当我们需要引入某个模块的时候,就是使用第3个参数,当我们要导出对象的时候,就将其放到第2个参数中。

实际上webpack也是这么做的,当使用es的import的时候,它会被转换成使用webpack_require函数,根据模块在参数数组中的指定下标,去获取模块的导出对象。

当使用es的export的时候,导出对象会被放入webpack_exports对象中。

无论我们使用的CommonJS,还是ES的模块,webpack都会很好地处理好这些转换关系,最终导出的文件通过这种方式,实现了各个模块相隔离,并且能维护和依赖它们之间调用关系。

引入CDN文件

为了提高资源访问的速度,有时候会需要用到CDN的js资源,为了能使用CDN的资源同时又能在开发中正常使用该怎么办呢?首先肯定要在HTML中添加我们的CDN资源(注意不要在package.json中安装所需依赖,否则就不是CDN了),假如要使用jQuery的话,修改代码如下。

1
2
3
4
5
6
7
8
9
10
11
12
<!-- ./dist/index.html -->
<!DOCTYPE html>
<html lang="en">
<head>
<meta charset="UTF-8">
<title>Document</title>
</head>
<body>
<script src="https://cdnjs.cloudflare.com/ajax/libs/jquery/3.2.1/jquery.min.js" defer></script>
<script type="text/javascript" src="./app.bundle.js" defer></script>
</body>
</html>

当然,webpack的配置文件也要修改,为了能使用外置的依赖,配置文件中需要用到externals设置项。

1
2
3
4
5
6
7
8
9
10
11
12
13
14
15
// ./webpack.config.js
const path = require('path');

module.exports = {
entry: {
app: './src/index.js'
},
output: {
filename: '[name].bundle.js',
path: path.resolve(__dirname, 'dist')
},
externals: {
jquery: 'jQuery'
}
}

接下来,就是使用了,现在只要正常引入依赖就行了。

1
2
3
4
5
6
7
8
import $ from 'jquery';
// ...
const component = function() {
// ...
$(btn).html('Click me and check the console!');
// ...
}
// ...

然后编译,再打开页面验证结果,会发现执行完全没有问题,结果跟预想的完全一样。

当然仅仅知道怎么做还不够,我们再来看看打包文件发生了什么变化。

1
2
3
4
5
6
7
8
9
10
(function(modules) {
// handle modules
})([(function() {
// modules 0
}), (function() {
// modules jQuery
module.exports = jQuery;
}), (function() {
// modules 2
})]);

生成的文件中多了一个模块,里面只有一句话,就是返回了一个jQuery对象,但是jQuery对象并不是我们定义的,原来jQuery通过script引入后,jQuery就是一个全局对象,这里生成的模块会直接返回这个全局对象,所以我们就能在自己的源码中直接引入并使用了。

注意jQuery这个对象被导出也是被指定的,就是刚刚在webpack的配置文件的externals中被指定的,假如我们将配置文件改为如下情况。

1
2
3
4
5
6
7
// ...
module.exports = {
// ...
externals: {
jquery: '$'
}
}

则生成打包文件中的源码如下:

1
2
3
// ...
module.exports = $;
// ...

这样做效果也是一样的。

总结

webpack中还可以引入CSS,图片等资源,如果引入这些资源的话打包文件还会生成一些内置的依赖模块(比如CSS的话,webpack配置好之后,内置模块会将其生成到HTML的head标签中)。

此外,一些额外的三方插件也会生成一些模块,,同样也是放到打包文件的IIFE的参数数组中,关于这些模块我们这里不再深入分析,感兴趣的同学可以去了解一下。

本文只对webpack的打包文件做了一个比较浅层次的分析,如果初学者看到这篇文章的话,希望能稍微加深一下对webpack生成的打包文件的理解。

参考

1: Externals - Webpack Document